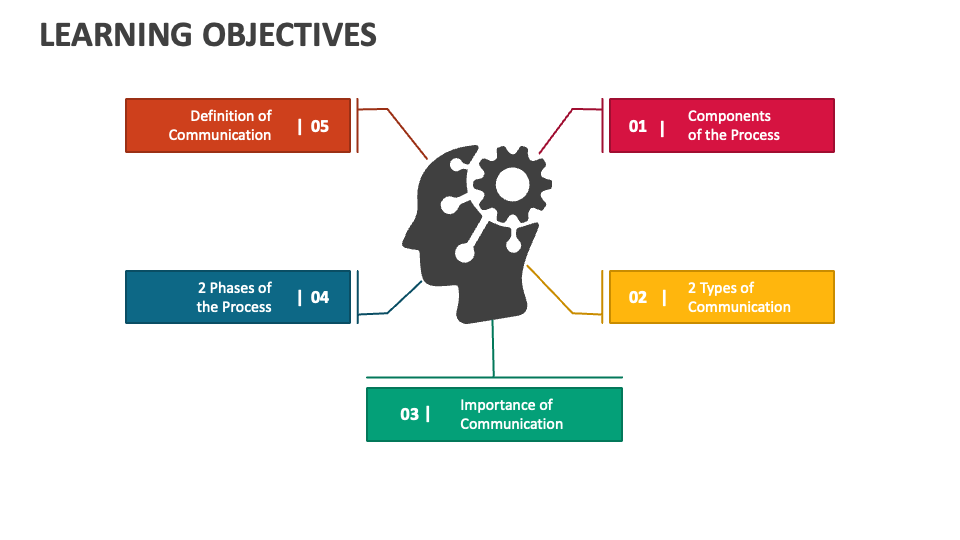
Learning Objectives Understand the concept of levels. Create multiple levels in a project. Understand the usage and concept of using grids in a project. - ppt download
4.7 (632) · $ 11.00 · In stock
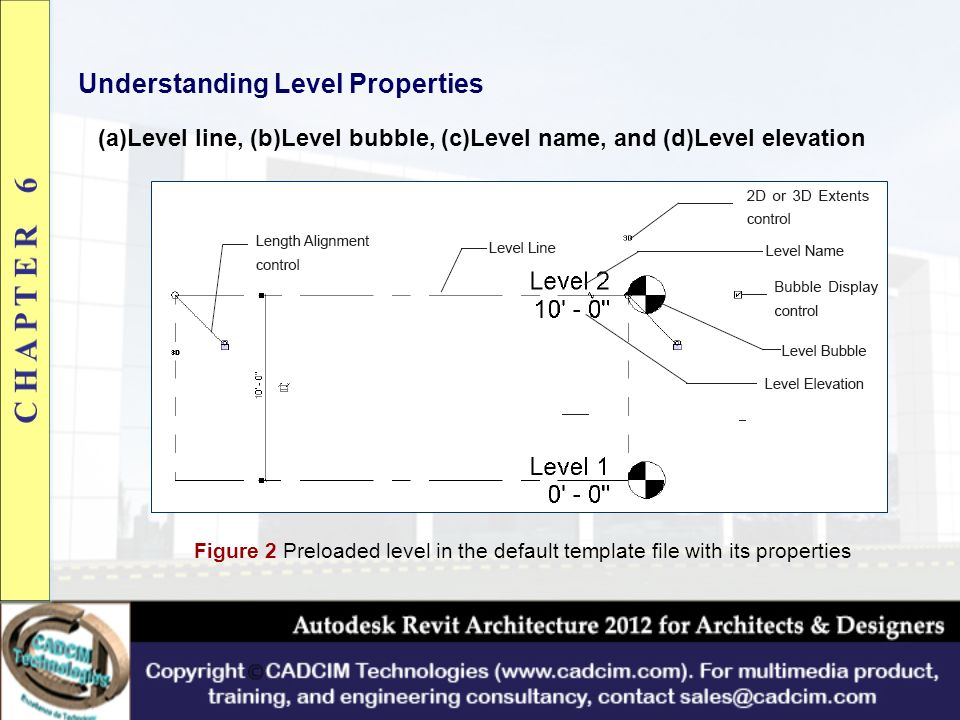
Understanding Level Properties (a)Level line, (b)Level bubble, (c)Level name, and (d)Level elevation Figure 2 Preloaded level in the default template file with its properties
Create multiple levels in a project. Understand the usage and concept of using grids in a project. Create rectangular and circular grids in a project file. Use the Work Plane and Reference Plane tools in a project. Create a plan view in a project. Create and understand the usage of the elevation view. Create section views and modify their properties. Understand the use of the Scope Box tool..
WORKING WITH LEVELS Infinite horizontal planes that define each story, Figure 1 Figure 1 Levels displayed in a multistory building project
Figure 3 The Properties Palette for a level Figure 4 Partial view of the Type Properties dialog box for a typical level
Level Type Properties Elevation Base Line Weight Color Line Pattern Symbol Symbol at End 1 Default Symbol at End 2 Default Automatic Room Computation Height Level Instance Properties Elevation Name Scope Box
Adding Levels Ribbon: Home > Datum > Level Shortcut Key: LL Figure 5 Choosing the Level tool from the Home tab of the ribbon Figure 6 Specifying the distance of the new level from an existing level
Figure 7 Using the alignment line to specify the endpoint of the level line Figure 8 The highlighted level with its constraints and controls
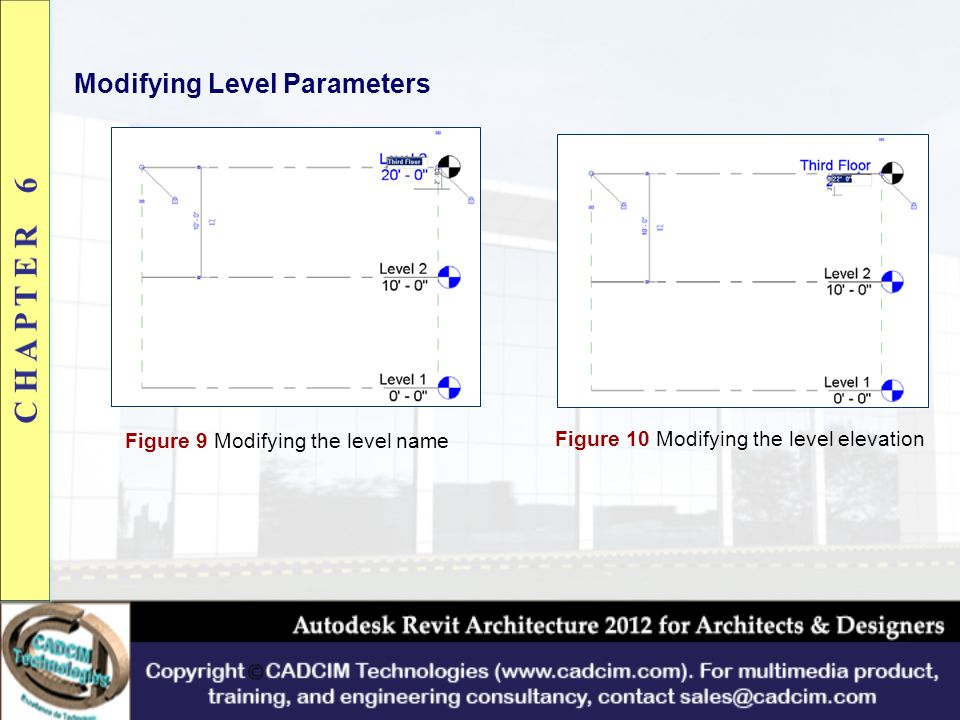
Modifying Level Parameters Figure 9 Modifying the level name Figure 10 Modifying the level elevation
Figure 11 Moving the level to a different location
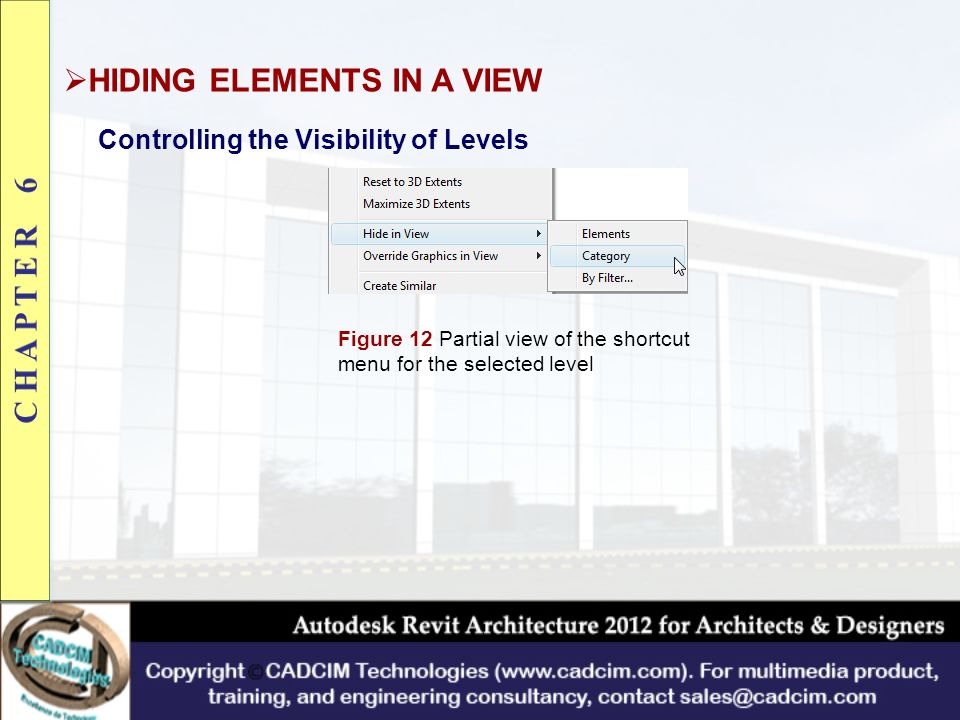
HIDING ELEMENTS IN A VIEW Controlling the Visibility of Levels Figure 12 Partial view of the shortcut menu for the selected level
WORKING WITH GRIDS Creating Grids Shortcut Key: GR Figure 13 Invoking the Grid tool from the ribbon Figure 14 Various options in the Modify | Place Grid tab
Creating Grids Using the Draw Tool Figure 15 Sketching a grid line Figure 16 Creating horizontal grid line Figure 17 Specifying the distance of the second grid line
Figure 18 Drawing multiple horizontal grid lines
Figure 19 Examples of grid patterns created using the Draw option and straight grid lines
Figure 20 An example of a grid pattern created using the semi-circular and straight grid lines
Figure 21 Selecting the interior face to align the grid line Figure 22 Grid line created along the interior face of the selected wall using the Pick tool
Figure 23 Creating a grid line along the centerline of the wall using the Offset option Figure 24 Completed grids created using the Pick option
Figure 25 Modifying the distance between the grids
Figure 26 A grid bubble offset created
Grid Properties (a)Grid line, (b)Grid bubble, (c)grid name, and other controls, Figures 27 and 28 Figure 27 A typical grid line pattern with its controls
Figure 28 Partial view of the Type Properties dialog box of a grid
Grid Type Properties Symbol Center Segment Center Segment Weight Center Segment Color Center Segment Pattern End Segment Weight End Segment Color End Segment Pattern End Segments Length Plan View Symbols End 1(Default) Plan View Symbols End 2(Default) Non-Plan View Symbols (Default) Grid Instance Properties Name Space Box
Customizing the Grid Display Changing the Continuous Grid Line Creating a Grid Line with Central Gap Creating a Grid Line with Center Segment Figure 29 Figure showing the grid line with a central gap Figure 30 Figure showing the grid line with a center segment
Controlling the Visibility of Grids Figure 31 Partial view of the shortcut menu for the selected grid
REFERENCE PLANES Ribbon: Home > Work Plane > Ref Plane > Draw Reference Plane Shortcut Key: RP WORK PLANES A plane that can be used for sketching elements Setting the Work Plane Figure 32 The Work Plane dialog box
Controlling the Visibility of Work Planes Figure 33 The work plane grid for the Apartment 1 project
Viewing the Building Model Figure 34 Project Browser showing the standard building views
Visibility/Graphic Overrides of an Element Visible Halftone Transparent Projection Lines Surface Patterns Cut Lines/Cut Patterns Figure 35 The View-Specific Element Graphics dialog box
Visibility/Graphic Overrides of an Element Category Figure 36 The Visibility/Graphic Overrides for Floor Plan dialog box
Making Elements Transparent Figure 37 Before selecting the Transparent check box Figure 38 After selecting the Transparent check box and making the wall, door, and roof transparent in the view
Using the Temporary Hide/Isolate Tool Hide the elements temporarily from the project view, Figure 39 Revealing and Unhiding the Elements Figure 39 Invoking the Temporary Hide/Isolate tool
Plan Views Adding a Plan View Figure 40 Partial view of the New Plan dialog box Modifying the Plan View Properties
Elevation Views Model from the four sides, North, East, South, and West Creating an Elevation View Figure 41 Placing the elevation symbol for creating the exterior view Figure 42 Controls of the elevation symbol
Figure 43 Placing the elevation symbol for creating the interior elevation view Figure 44 Adding the interior view using the elevation controls
Figure 45 The clip plane drag controls Figure 46 Dragging the clip plane controls
Figure 47 Displaying a view using the Go To View dialog box
Section Views Creating a Section View Figure 48 Specifying the start point and the endpoint of the section line Figure 49 The section line and its controls
Modifying the Section View Figure 50 Dragging the section lineFigure 51 The updated section view
Figure 52 The modified view depth with its corresponding updated section view
Figure 53 The Properties Palette for a section view
Creating a Segmented Section Figure 54 The segmented section with the corresponding modified section view Controlling the Visibility of a Section Line Creating a Detail and a Wall Section View
Using the Scope Box Tool Creating a Scope Box Figure 55 The scope box created in the plan view with its controls
Applying the Scope Box Controlling the Visibility of a Scope Box Figure 56 Controlling the visibility of the scope boxes using the Scope Box Views Visible dialog box
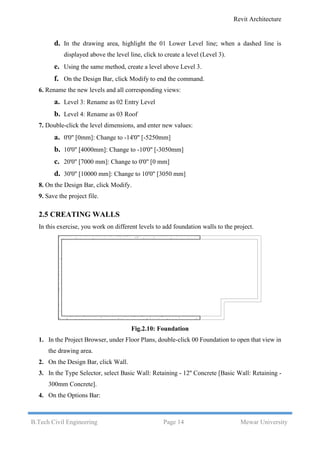
Create the wall elevation for the kitchen walls and also the sections based on Figure 57. Figure 57 Sketch plan for adding grids, sections, and elevations to the Apartment 1 project.
2.Add levels using the Level tool, refer to Figures 58 through 61. Figure 58 The north elevation of the Apartment 1 project.
Figure 59 Specifying the distance of the new level
Figure 60 Creating the new level line using the alignment line
Figure 61 North elevation showing the created and renamed levels
Figure 62 Specifying the start point of the grid line Figure 63 Creating the first vertical grid line.
Figure 64 The horizontal and vertical grids created for the wall centerlines
Figure 65 Creating a section line for the section view.
Figure 66 The section lines created for the section views
Figure 67 Section view of Section X.
Figure 68 Kitchen-North wall elevationFigure 69 Kitchen-South wall elevation This completes the Tutorial 1 for adding levels, grids, and sections to the Apartment 1 project.
Also, create sections based on Figure 70. Figure 70 Sketch plan for adding grids and creating section views for the Club project.
2.Modify levels by dragging, refer to Figures 71 and 72. Figure 71 Existing levels for the Club project.
Figure 72 Renamed levels and views for the Club project
Figure 73 Grid line created using the Line tool.
Figure 74 Grids created for the Club project
Figure 75 The profile after creating the section line.
Figure 76 Creating the second section line
Figure 77 Displaying the section view for the Club project This completes Tutorial 2 for modifying levels, adding grids, and creating section views for the Club project.
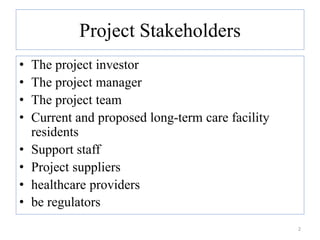
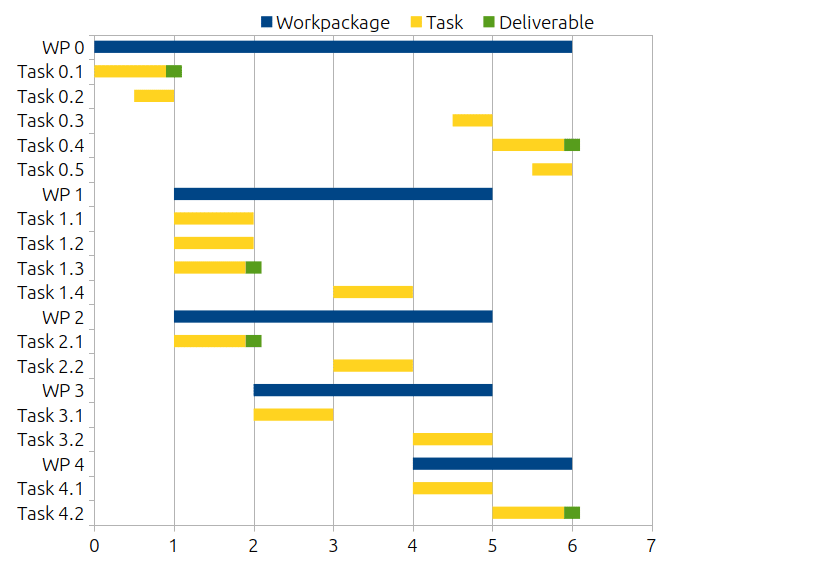
Project team management
_1661505012.png)
Creating Levels, Grids, Layout and model elements for a residential unit using REVIT
Learning Objectives Understand the concept of levels. Create multiple levels in a project. Understand the usage and concept of using grids in a project. - ppt download
Learning Objectives Understand the concept of levels. Create multiple levels in a project. Understand the usage and concept of using grids in a project. - ppt download

Learning Objectives Understand the concept of levels. Create multiple levels in a project. Understand the usage and concept of using grids in a project. - ppt download

A Guide to Using ChatGPT For Data Science Projects

How to Make an Infographic in Under 1 Hour (2024 Guide) - Venngage
Gantt Charts in Construction: Everything You Need to Know

Part 5: High-Level Solution Design (HLD) Documents: What Is It and When Do You Need One
Learning Objectives PowerPoint Presentation Slides - PPT Template
80 types of charts & graphs for data visualization (with examples)

Artificial intelligence powerpoint presentation slides, Presentation Graphics, Presentation PowerPoint Example